‘Paste-the-wall’ wallcoverings use a special backing containing ‘non- woven’ or polyester fibers, which means that the wallcovering is dimensionally stable and doesn’t expand when wet. Allowing the paper to be hung dry from the roll, reducing the installation time by around half. No paste table is needed, there’s no soaking time, and it’s easier to cut around light switches and sockets, because the paper is dry.
Our wallpaper is a beautiful thing, and hanging it should be undertaken with the same delicacy and precision we put into making it. Paste the wall’s dimensional stability also means there is less risk of bubbling, creasing or edge curl. Overall, it’s a much easier product for the newcomer to paperhanging. The best adhesive to use is an all-purpose ready mix; but any good wallpaper paste will do the trick.
Wallpaper is also no longer a life sentence. Removing it is just as easy as putting it up. Gone are the days of struggling with stubborn wallpaper, cementing the thought that you’ll never hang wallpaper again! Those days are history when it comes to the non-woven paste-the-wall wallpaper by Milton & King. To help with both the installation and removal of our wallpapers, we’ve rustled up a few insider’s tips.
Download Hanging Instructions
Download Hanging Instructions (two-roll-set)
No it’s not too difficult and you can totally do it!! All Milton & King wallpaper is manufactured using a non-woven, paste-the-wall base, and finished/trimmed with a butt-join seam. This means that installing our wallpaper is a relatively simple process. You just require a good dose of patience and have a well prepared surface.
We recommend using a strong all-purpose tub adhesive. Most commercially available pastes are of equal quality and for most applications will do the trick. You can pick these up from any good hardware store or wallpaper shop. We generally like to recommend a good tub adhesive like Roman Ultra Clear or Zinsser Sure grip. Only because we know they work.
You’ll need:
Preparing a wall for wallpaper is like laying good foundations for a beautiful home. It needs to be done methodically, and thoroughly. So find the perfectionist within you and follow these steps:
Primer acts as a protectant/sealer that prevents the paste from being absorbed into a unpainted wall and allows it to grip to slick surfaces. It is highly recommended that you prime a wall before hanging wallpaper because it creates an even surface for the wallpaper to adhere to as well as makes the wallpaper removal process much easier should you ever decide to update the wallpaper.
Sizing a wall refers to a coat of paste you apply to the wall prior to wallpapering. This process creates a uniform surface for the wallpaper to adhere. Although sizing is not always necessary, it has many benefits including easier wallpaper application, increased grip between the wallpaper and the wall, and easier wallpaper removal. It is especially recommended for wallpapering on plastered, repaired, or porous walls. Once your walls are clean and smooth you are ready to begin sizing.
Yes we recommend you do. Inspect every roll to ensure that all rolls are in good condition, with no variations in shade, and that no other faults are present. In the unlikely event that there is a manufacturing error with your product, it’s much easier to rectify the issue prior to installing it. The company cannot accept liability for defects that are apparent at the time of hanging, nor can the company be responsible for any consequential loss. After hanging 2 or 3 lengths we strongly recommend that you carefully inspect the results again.
After following the normal checks of batches, and drawing a plumb line follow these 3 easy steps:
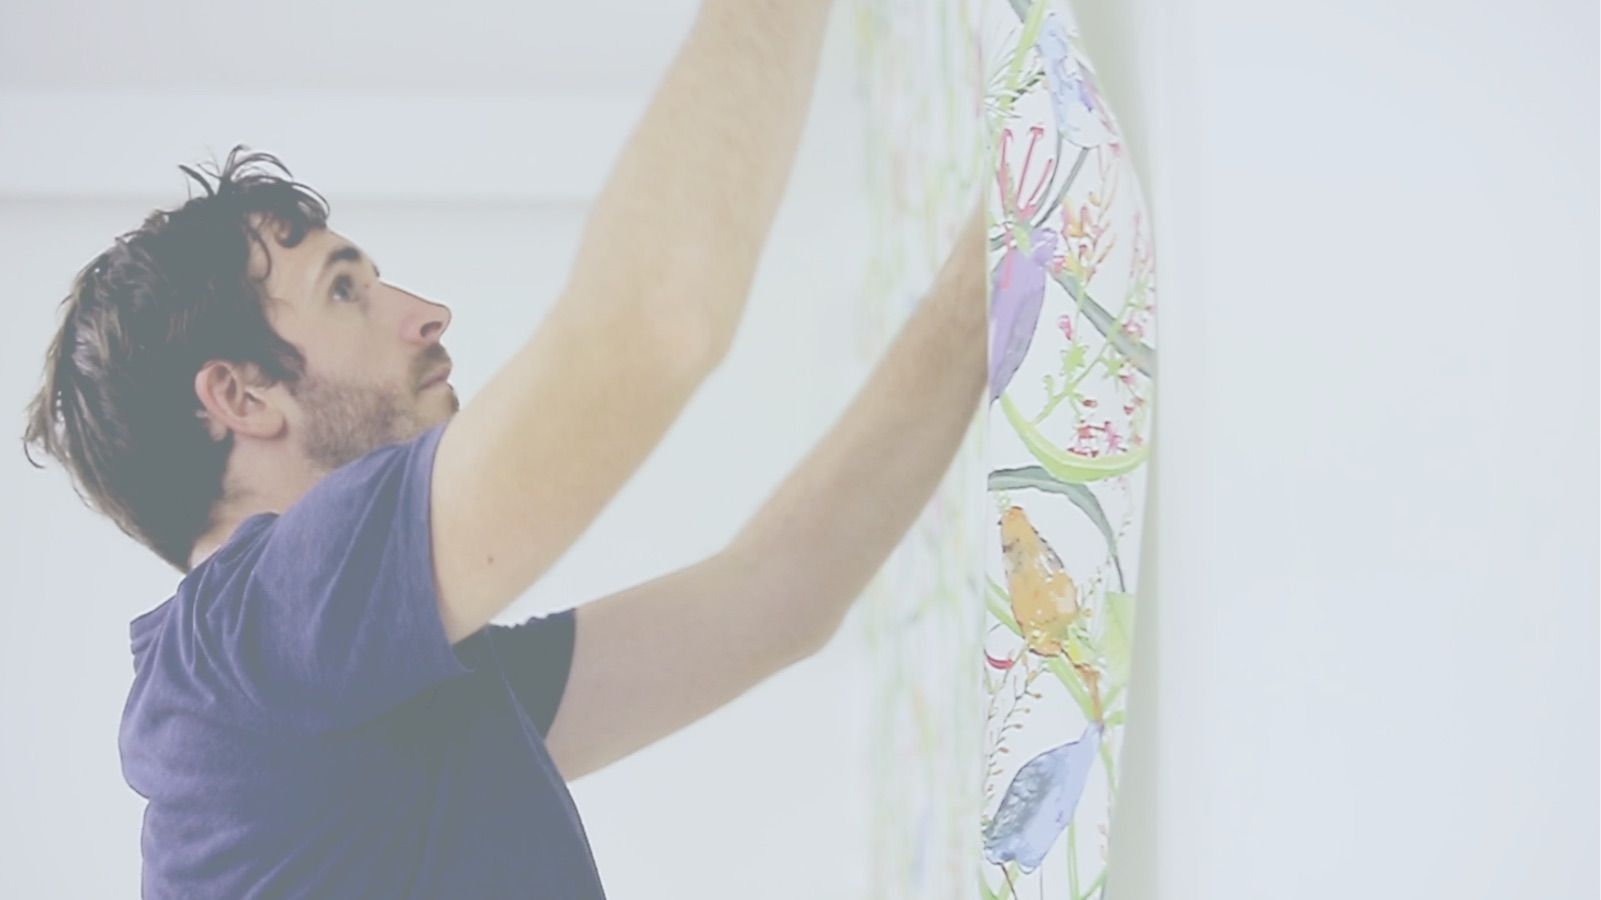
Step 1: Paste the wall rather than the paper. This is the quickest, cleanest and easiest way to wallpaper as unlike conventional wallpaper you can paste the wall rather than the paper, meaning no soak time and no pasting table, cutting decorating time in half.
Step 2: Hang dry straight from the roll, because ‘Paste-the-wall’ products are dimensionally stable when wet there is no need to soak them. This means the product can be hung dry from the roll, with less mess.
Step 3: Trim for perfect finish. Because it is hung dry ‘Paste-the-wall’ is easier to trim either with a knife or by running the back of your scissors along the edge of the wallpaper. This will leave a visible crease on the front and back of the wallpaper, cut along this crease and brush back into place for a perfect finish. Plus: It is easy to remove. ‘Paste-the-wall’ is easy to remove when you fancy a change – simply lift a corner and peel upwards to remove.
Most people find that papering straight from the roll cuts decorating time in half, plus, because the pasting table process is eliminated, it not only means you don’t need as much space but it’s a lot cleaner and less messy too.
Don’t paste the entire wall before starting to hang your wallpaper. Simply paste one drop at a time and work around the room methodically.
Prepare your walls in the same manner you would if you were applying wallpaper. By filling and sanding any imperfections on your wall and clean the wall with detergent or sugar soap.
We find it much easier if you lay your complete mural out on the floor so you can see it in its entirety prior to installing. This is also a good time to check for any manufacturing faults.
Your mural is manufactured in panels. Each panel is marked with its order number. Measure 600mm out from your starting point and use a plumb like to draw a vertical line. This gives you a straight edge to line the right hand edge of your first panel. Starting with Panel 1, line the right hand edge up to your plump line; working from left to right. When you are happy with the position, smooth down and trim the excess top and bottom. Continue to cut and paste each section as you go.
All Milton & King wallpapers are washable using a mild soap that does not contain detergent. Make sure you do not get the wallpaper too wet. It is best to have a dry cloth with you to wipe away excess moisture. Finish this washing process by rinsing the wallpaper with a lightly dampened cloth or sponge with water alone. Then immediately dry the wallpaper with a terry-cloth towel. Dirt, dust and other marks can be simply cleaned using the above method. Stains caused by grease and oil, ball point pen, felt tip markers, crayons etc, may not necessarily be removed. Note: Please use caution when cleaning your wallpaper as Milton & King accept no responsibility for any loss or damage that may occur from their use or during cleaning.
Yes it is! Paste-the-wall wallpapers are designed to be dimensionally stable when installing and dry strippable making for easy removal. They peel off easily when it’s time to change, so there’s no need for steaming or soaking. Simply lift a corner at the base of the wall and peel upwards!
Small tears in your wallpaper are repairable! Wallpaper scraps can be used as a patch. Begin by removing any rough edges around the tear with a utility knife. Then cut a piece of wallpaper slightly bigger than the area you are trying to repair, make sure the pattern matches exactly, and cover the torn area with the patch. Use your knife to cut out a shape through the patch piece and the wallpaper underneath. The shape should be larger than the torn area. Now remove the underneath wallpaper that was cut out by your new shape. Apply paste to or activate the adhesive on the patch and fit it into the shape cut out of the wallpaper. Wipe away excess adhesive and smooth the wallpaper surface.
To get the best out of your wallpaper, please take the following points into consideration:
While our papers can be hung in bathrooms and kitchens, they are not suitable for high humidity areas. If planning to paper a humid room, please fully consider the general environment of the room and potential implications before you proceed.
Local conditions will differ from room to room depending on size, extraction, and general humidity, all of which give varying levels of condensation. As such, we cannot guarantee our papers’ suitability across all situations.
Please ensure sufficient ventilation; whilst our papers are wipe-able, they are not waterproof.
Air the room! Remember never to shut up a room of newly-hung wallpaper, but leave to air and maintain a normal room temperature to ensure the wallpaper dries properly. The room and wall should be kept at a minimum of +64°F (+18 °C).
Raised edges, blistering and gaps? These common problems are not due to the wallpaper, but rather to the amount of adhesive used, the surface and the method of wallpapering. Damaged materials are replaced with a defect-free version on production of an order. Milton & King is not responsible for painting and re-wallpapering costs or costs associated with loss of time or any other indirect damage.
All Milton & King wallpapers are washable using a mild soap that does not contain detergent. Make sure you do not get the wallpaper too wet. It is best to have a dry cloth with you to wipe away excess moisture. Finish this washing process by rinsing the wallpaper with a lightly dampened cloth or sponge with water alone. Then immediately dry the wallpaper with a terry-cloth towel. Dirt, dust and other marks can be simply cleaned using the above method. Stains caused by grease and oil, ball point pen, felt tip markers, crayons etc, may not necessarily be removed. Note: Please use caution when cleaning your wallpaper as Milton & King accept no responsibility for any loss or damage that may occur from their use or during cleaning.
Already have an account? Please login to access the members area and previous orders.
Are you new to Milton & King? Create an account for free today.
Please login to your account to view trade pricing, complimentary sampling and exclusive trade only products.
Our trade program is open to credentialed interiors professionals who love styling, designing, building or otherwise. We look forward to working together!